This post previously appeared on my blog, 'Absolutely No Machete Juggling'.
Contents
I recently completed a project that I’d been working on for a while and I wanted to share the details of how I did it in case other people might find it useful. After upgrading to a 4K TV, I decided I wanted to get a nice retro gaming setup going where I could play old video games on it. I had some fairly specific goals in mind for this project and I’ve now completed all of those goals so I consider it done (with a few caveats) and thought it was time to write it up.
It’s also worth noting that I am not an expert on a lot of this stuff. There are people out there who can talk to you about csync and SCART and mappers and all sorts of technical details about retro gaming, but I’m not one of those people. I didn’t want to get into the weeds on a lot of this stuff, and I had no interest in learning how to solder tiny little components together on 40-year-old gaming systems. This is more of a For Dummies sort of guide because that’s what I am. I very well could be getting things wrong, and nerdbags can feel free to correct me in the comments but I don’t recommend anyone read those comments because who cares? What I did here works and that’s all I ever cared about.
Getting this entire system going was probably the dorkiest thing I’ve ever done, and that’s coming from a guy who once wrote a 5,000-word blog post about Star Wars. Well strap in folks, this sucker’s over 10,000 words for, like, Mario and stuff.
UPDATE: A lot of these suggestions are out of date. Building a MiSTer FPGA is a far cheaper way to do exactly the same thing as what I detail in this post. It gives you the same lag-free FPGA-based experience but in a single device that is constantly being updated with new cores. Failing that, the Analogue Pocket (which is harder to get ahold of) has a firmware updater utility that downloads ported cores from the MiSTer, and that device has a handy dock that can connect to a TV. Both of those solutions are more comprehensive than all of these different devices I get into here, and vastly less expensive.
Motivation
So first, why did I even want to do this? The impetus was getting a 4K television. It may seem a bit weird to make such a new modern piece of technology the driver for getting way into playing old retro games, but the reason for this is a fairly good window into my mindset going into this project and I think it will help frame things.
Scaling
The original Nintendo Entertainment System (NES) resolution was 256x240, meaning each screen consisted of 256 pixels horizontally and 240 pixels vertically, generally referred to as “240 lines”.
If you’re playing something outputting 256x240 on a modern HDTV, then something has to scale the signal up. Otherwise, you’ll be looking at a tiny little box surrounded by huge black borders on all sides of your screen. Ideally, you want your television itself to do this scaling, quickly turning a signal with 240 lines into an image with 1080 lines (1080p) in a way that’s so fast it doesn’t introduce any lag. Introducing lag is the worst thing you can experience when retro gaming, because older games tended to rely on ultra-quick reflexes more than modern games do, and introducing just a few frames of lag might make some games unplayable.
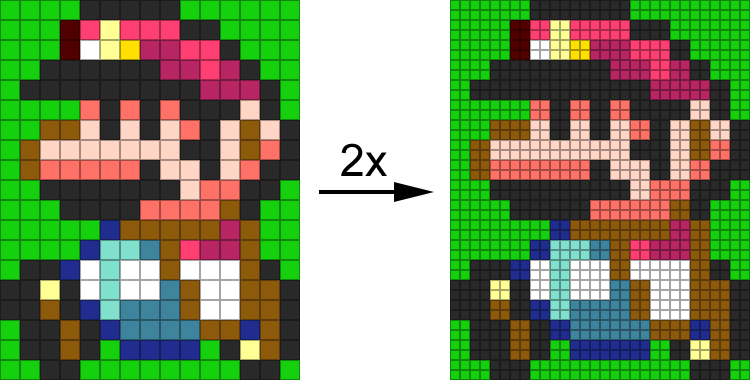
2x integer scaling example
So let’s imagine an old retro game that was outputting at 480x270 resolution. If we wanted to scale this for display on a 1080p television, it would be incredibly easy. 1080 divided by 270 is exactly 4. So we can turn a single pixel from the old game into a 4x4 grid of identically-colored pixels. This is called “integer scaling” because we’re scaling up each pixel of the game’s output by an integer factor to display it at a higher resolution.
The problem arises when you have an output like the NES’s 256x240 output. 1080 divided by 240 is 4.5, not 4 or 5. This means that when scaling up an NES’s output, you have two options. One, you can scale unevenly, so that the first pixel scales to a grid 4 pixels wide, then the next one scales up to 5 pixels wide, then 4, then 5, and so on. This results in pixels having slightly uneven sizes, which when scrolling can result in something called “shimmer”. The other option is to interpolate the overlapping “half” pixel on each side, basically blending them. This results in the image no longer looking perfectly crisp.
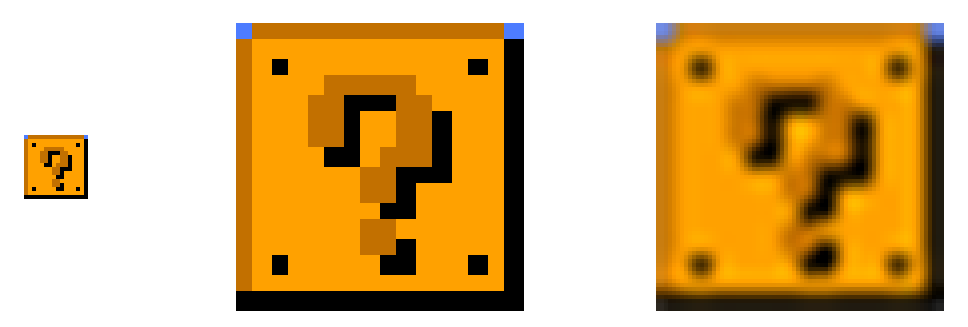
In the below example, the question block has been scaled in two different ways. The rightmost way is via “smoothing” or interpolation and it results in a blurry image. The middle way is without interpolation and it might seem better, but take a look at the small black dots in the corners of the question block. The top left one is scaled to 4x4, but the top right is scaled to 5x4, the bottom left is 4x5, and the bottom right is 5x5. If this question block were to scroll horizontally, the top-left dot would alternate between being 4x4 and 5x4 on every frame of output, which would cause it to look weird (“shimmer”) as Mario moves.
Non-integer scaling
Shimmering and interpolation are both too distracting for me, I hate the way both effects look. Retro gaming purists would tell me that I need to get an RGB Monitor but I wanted something that will just work with the one TV I own and make games playable in my living room. That was why for years I simply considered retro gaming a problem with no acceptable solution and didn’t bother.
The thing that’s so great about a 4K television is that it solves this problem almost entirely. 4K’s vertical resolution, 2160, is evenly divisible by 240. So if you stretch every pixel of an NES’s 256x240 pixel display by an integer scale of 9, you fill 2304x2160 pixels evenly, which leaves some black bars on the left and right side of the image. 2160 is evenly divisible by many common vertical resolutions including 240, 360, 720, and of course 1080.
Thus, getting a 4K TV meant that suddenly many retro game systems could output their native resolutions and be integer-scaled on my TV for pixel-perfect output. And so began my adventure.
Goals
I imagine the comments of this post will fill up with suggestions of why I should have done things their way - one thing I’ve learned is that the retro gaming “community” is extremely opinionated, borderline elitist. So let me spell out extremely clearly what my goals were with this project and why. If you are interested in doing something similar and have similar goals, the details of this post may be useful to you. If you don’t have similar goals, my solutions here likely aren’t going to be useful to you but I wish you the best of luck in your endeavor.
1. No Emulators
First thing’s first, the most obvious solution to retro gaming is “install an emulator” or “build a raspberry pi” or “just get an NES Classic” or “buy a RetroN 5” - none of these solutions work for my goals.
Emulators introduce differences that I, unfortunately, do notice, most notably around the sound not quite being right and around introducing lag that I find unacceptable. I played with an NES Classic for about 10 seconds before packing it up and returning it, I found the lag it introduced made it virtually unplayable to such a degree that I genuinely don’t know how anyone else can stand it.
I’ve had emulators installed on HTPCs before and even worked with great frontends like RetroArch. I’ve got ROMsets with every retro game ever made at the ready but I never found myself playing any of these old games because I disliked the graphical quirks, sound inaccuracy, and of course the lag, lag, lag, LAG!
I wanted to be able to play old games without an emulator, so to pull this project off there could be no reliance on emulation of any kind.
I also wanted to be able to use original controllers, or at least controllers looking and feeling original enough in my hands. I didn’t want to play Super Metroid with a PS4 controller, it just feels weird.
2. No Cartridge Collecting
Pictured: not me
When I was a kid I owned all 6 NES Mega Man games because Mega Man was my favorite franchise. If I wanted to play those again with the physical cartridges, I’d have to buy them on eBay and the lot of all 6 costs about $200. I wanted access to all my old games as well as games I never actually owned without filling shelves upon shelves with plastic. I devote enough space in my living room to physical media in the form of Blu-ray discs, I couldn’t justify becoming one of those dudes with a thousand dusty physical cartridges.
Even though I grew up playing a lot of these systems, I sold everything associated with them long, long ago and would be starting mostly from scratch. The idea of having to acquire many pounds of physical goods just to catch back up was too daunting.
In short, I didn’t want this project to take over my life in some way. I have access to the entire ROMsets for most consoles through various online channels, I wanted to be able to use them. I wanted to be able to seamlessly switch between different games without finding cartridges on meticulously alphabetized shelves or deal with custom printing plastic cases.
3. Integrate with Living Room
I wasn’t interested in having a CRT monitor in my house, this whole project needed to integrate well into my living room, which I also use for watching movies and TV shows. This meant playing games on my one 4K TV from the couch, so wireless controllers (with no lag) were ideal as well.
I’ve always liked the crisp look of emulators, the pixel-y graphics and blocky sprites. I didn’t want to be messing around with fake scanlines or shaders that smooth jagged edges. The retro look is part of the appeal to me, so I needed everything to look like it was running in an emulator, without actually doing so.

Thanks I hate it
Additionally, My TV is black and my entertainment center cabinet is black, I wanted everything to look like it belonged without standing out like a sore thumb. It was weirdly important to me that things just “look nice” so I wanted everything to be black, like a modern piece of electronics. I didn’t want this project to turn our TV room into a “video game room” or turn our house into a “weird video game collector house” - I just wanted to play some Zelda.
This whole setup needed to be integrated well enough and simple enough to use that my wife could play games without me. My wife is the same age as me, so she also fondly remembers video games and wanted to be able to pick up a controller and play as well.
However, I didn’t want to force her to nerd-out on this stuff the way I did just to get things to work, I wanted it to be easy to come downstairs and play a game with little technical knowledge of how things are connected. If she was futzing around with inputs and switches to play The New Tetris, I failed.
4. Access to All Childhood Systems
I needed to be able to play every game and every game system I fondly remember from my youth. I was basically done with video games before the GameCube came out, so nothing from that era or later was important. However, my best friend had a Sega Genesis that I’d play at his house all the time, so that was essential. To get specific, here are the systems I wanted access to:
- Atari 2600
- Nintendo Entertainment System (NES)
- Super Nintendo Entertainment System (SNES)
- Nintendo Game Boy
- Sega Genesis
- Sega Game Gear
- Nintendo 64
With the goals in mind, I tried many different options but have finally arrived at a setup that I feel checks every single box. I’m going to walk you through my entire setup, providing links and prices where possible to help anyone interested in doing something similar benefit from my many failures.
So without further ado…
Systems
Super NES
The Super Nintendo was hands-down my favorite system growing up. It wasn’t my first or my last system, but all my favorite games were on that system. I’m not going to sit here and list all of them, but I believe peak retro games happened on Super Nintendo - every great franchise had what I see as its best game released on the SNES.
Console

This was one of the easiest systems to get. No need for original hardware or modding, just picking up a Super Nt from Analogue ($189.99).
The Super Nt relies on an FPGA chip, which I do not consider emulation. Essentially this is a special kind of chip that can be updated via software to be any other kind of chip, and the one in the Super Nt has been programmed to be a Super Nintendo chip. This means that games running on the chip are, for all intents and purposes, running on an actual Super Nintendo chip and that means no emulation and no lag.
Analogue sells a black edition of the system so it fits well with my entertainment center, and the unit works perfectly. There’s a jailbreak firmware update that lets the system do a little more, but I consider most of the extra stuff emulation so I don’t bother.
Most importantly, the Super Nt directly outputs HDMI at 720p or 1080p resolution. 720 is a 3x integer multiple of 240. The Super NES outputs at 224 vertical lines, so with some small black bars at the top and bottom of the screen, the Super Nt integer scales up to a perfect 720p which my TV then integer scales again get to 2160p. No shimmer, no blurring, no interpolation.
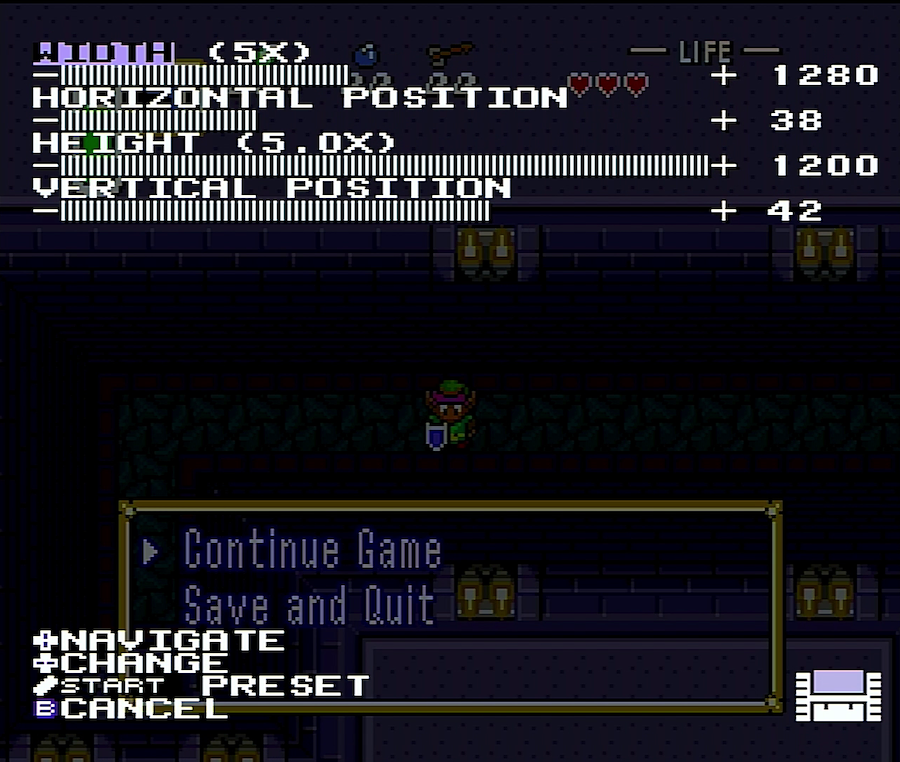
I actually have my resolution set to 1080p60 which means 1080 lines at 60 frames per second. I do a 5x integer scale and I turn off all Horizontal and Vertical interpolation so nothing should ever blur. Because the SNES only outputs 224 vertical lines instead of the full 240, doing a 5x scale gives me 1120 vertical lines, which is just slightly more than the 1080p. Thus, this setting cuts off a small amount of the top and bottom of the game’s screen, but the tradeoff is there are no black bars at the top and bottom from doing a 3x scale to 720p. It cuts off about the same amount of the image that a CRT screen used to, so game designers rarely put anything useful in that area and I prefer to the fill the screen a bit more.
Controllers
I went wireless wherever I could, and in this case, the 8BitDo SN30 Gamepad ($39.99) works great. I did not go with the black edition here because the black ones don’t look like the controllers from my childhood, but they do work just as well with the black Super Nt. They mostly look and feel exactly like the original SNES controller. Some 8BitDo controllers can be a little hit or miss (the NES one is garbage, for example) but I’ve had no issues with these and aside from some general wireless connectivity hassles they work great.
They charge with a standard Micro USB port which means I can use magnetic charging cables ($18.99). I keep all of my controllers in a little drawer and have them all charging without having to find the right kind of cable, which is great - I put the little magnetic adapters in all of the controllers and then just find an open magnetic cable to hook it to when a controller needs a juice-up.
The range of the 8BitDo controller is adequate, battery life is great, and there is virtually zero perceptible lag added.
Games
There are many flash carts available for the Super Nintendo. Flash carts are cartridges that can be used with an actual system but when booted present a menu of games from an SD card, which you can then load as if that game was inserted. They work with real systems and since the Super Nt is effectively a real system, flash carts work with the Super Nt as well.
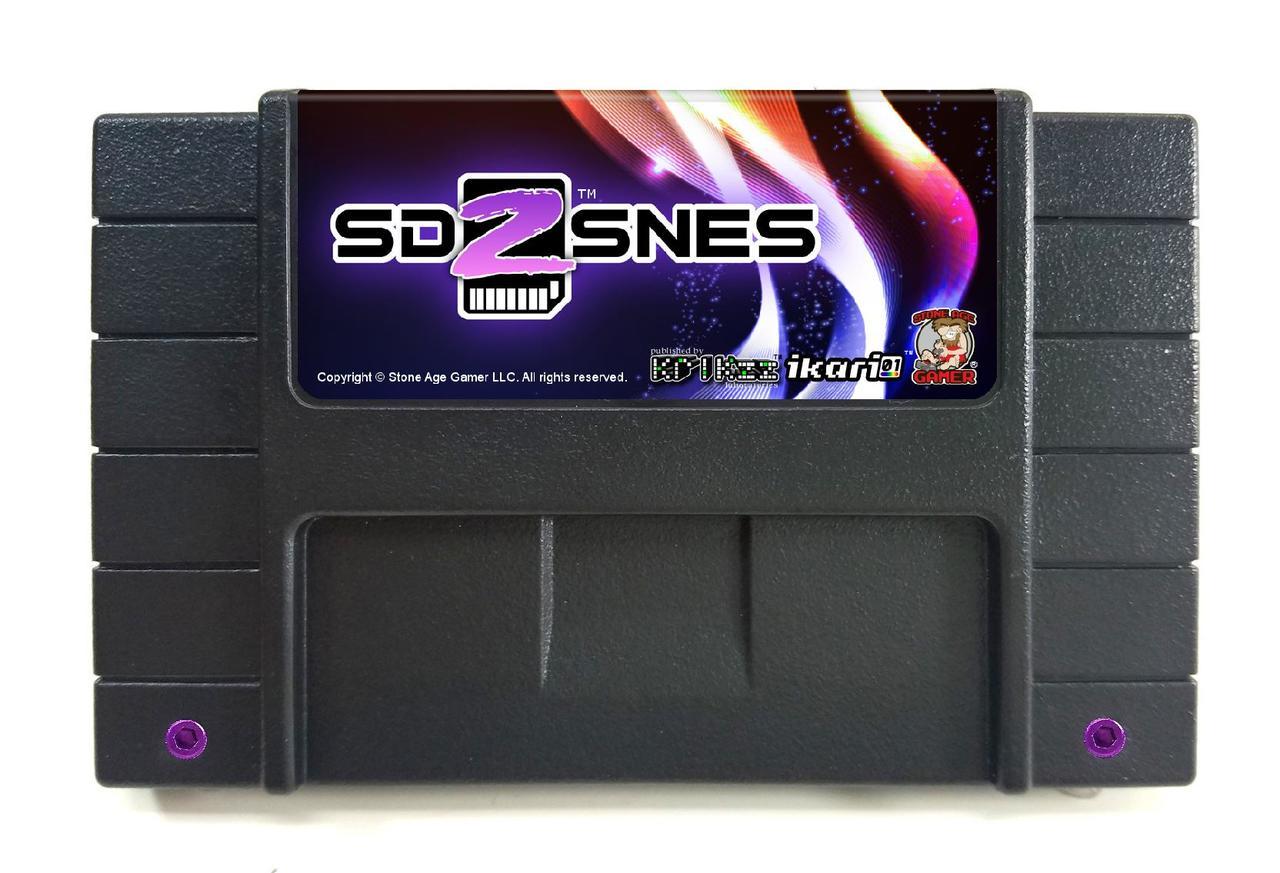
For Super Nintendo there are two options: the Super Everdrive and the SD2SNES. Of these, go with the SD2SNES. The reason is that the SD2SNES cart has something the Everdrive doesn’t: its own FPGA chip. Many Super Nintendo games came with extra chips in the cartridge to give the system extra capabilities - most notably Super FX games like Starfox, Yoshi’s Island, and Stunt Race FX, as well as the CX4 chip used in games like Mega Man X2 and Mega Man X3. The Super Nintendo itself didn’t have these chips, it relied on the cartridges to have them, which means the Super Nt FPGA chip doesn’t have them either. The SD2SNES cartridge, however, does have an FPGA chip programmed with all these additional chips, meaning it’s the only flash cart that will allow you to play games that utilize extra chips.
Recently a new model of the SD2SNES came out called the SD2SNES Pro which uses an improved FPGA chip, but the best thing is that Stone Age Gamer sells custom-designed cartridges, meaning you can get a nice black one that can just stay in the Super Nt at all times for $204.99. The entire SNES library will fit on a single 2GB MicroSD Card, which is actually so small it’s hard to find, a 16GB card will only run you $5.
One nice thing is that you can access and play an entire library of ROM Hacks with this setup, and the SD card will have plenty of room for alternative versions of games. Most ROM Hacks are pretty stupid graphics hacks turning Mario into a giant penis or whatever, but many hacks are English translations of Japanese RPGs that were never ported to the US, or bugfix releases for broken games with critical flaws. There are even entirely new games that are playable on a flash cartridge, like The Legend of Zelda: Parallel Worlds.
The SD2SNES does indeed give you the ability to save your game state like on an emulator as well, so this entire setup is similar to an emulator but with zero lag.
| | Component | Cost | |
|---|---|---|
| Super Nt FPGA console | $189.99 | |
| 8BitDo SN30 Controllers (x2) | $79.98 | |
| SD2SNES Pro Flash Cart | $204.99 | |
| 16GB microSD Card | $5.00 | |
| Total | $479.96 |
NES
What kind of retro gaming setup would be complete without a Nintendo Entertainment System? While the NES didn’t house many of my favorite games, it certainly accounted for how I spent the bulk of my gaming childhood. The NES was like the system that got me into gaming before the Super NES perfected everything, and I played it more than any other singular system.
Console
Analogue (maker of the Super Nt) made a NES clone called an Nt Mini that actually recycled chips from original NES systems. They also ran out of stock and the systems are only now available on eBay for over $1,000 each, so that’s a hell no from me.

I'm an artist.
Luckily, there is an FPGA-powered NES clone that does for the NES what the Super Nt does for the Super Nintendo: The retroUSB AVS ($185.00). This system is incredibly ugly but it plays NES and Famicom games perfectly using an FPGA chip programmed to behave like an NES chip. It has 4 controller ports built in so there’s no need for an NES Four Score adapter if you want to play one of the almost-no-games for the NES that support 4 players.
The AVS outputs at 720p over HDMI, integer scaling the NES’s 240 vertical resolution perfectly by 3x. It also has options to enable more sprites per scanline (which eliminates some annoying flickering in many NES games you’ve likely noticed) and options to cut off the left and right sides of the screen which often contain glitchy graphics that CRT televisions would cut off.
You may be wondering where the black option is for this system. Unfortunately, it does not exist - the AVS only comes in an ugly beige color that stands out on my entertainment center. So yes, I painted it.
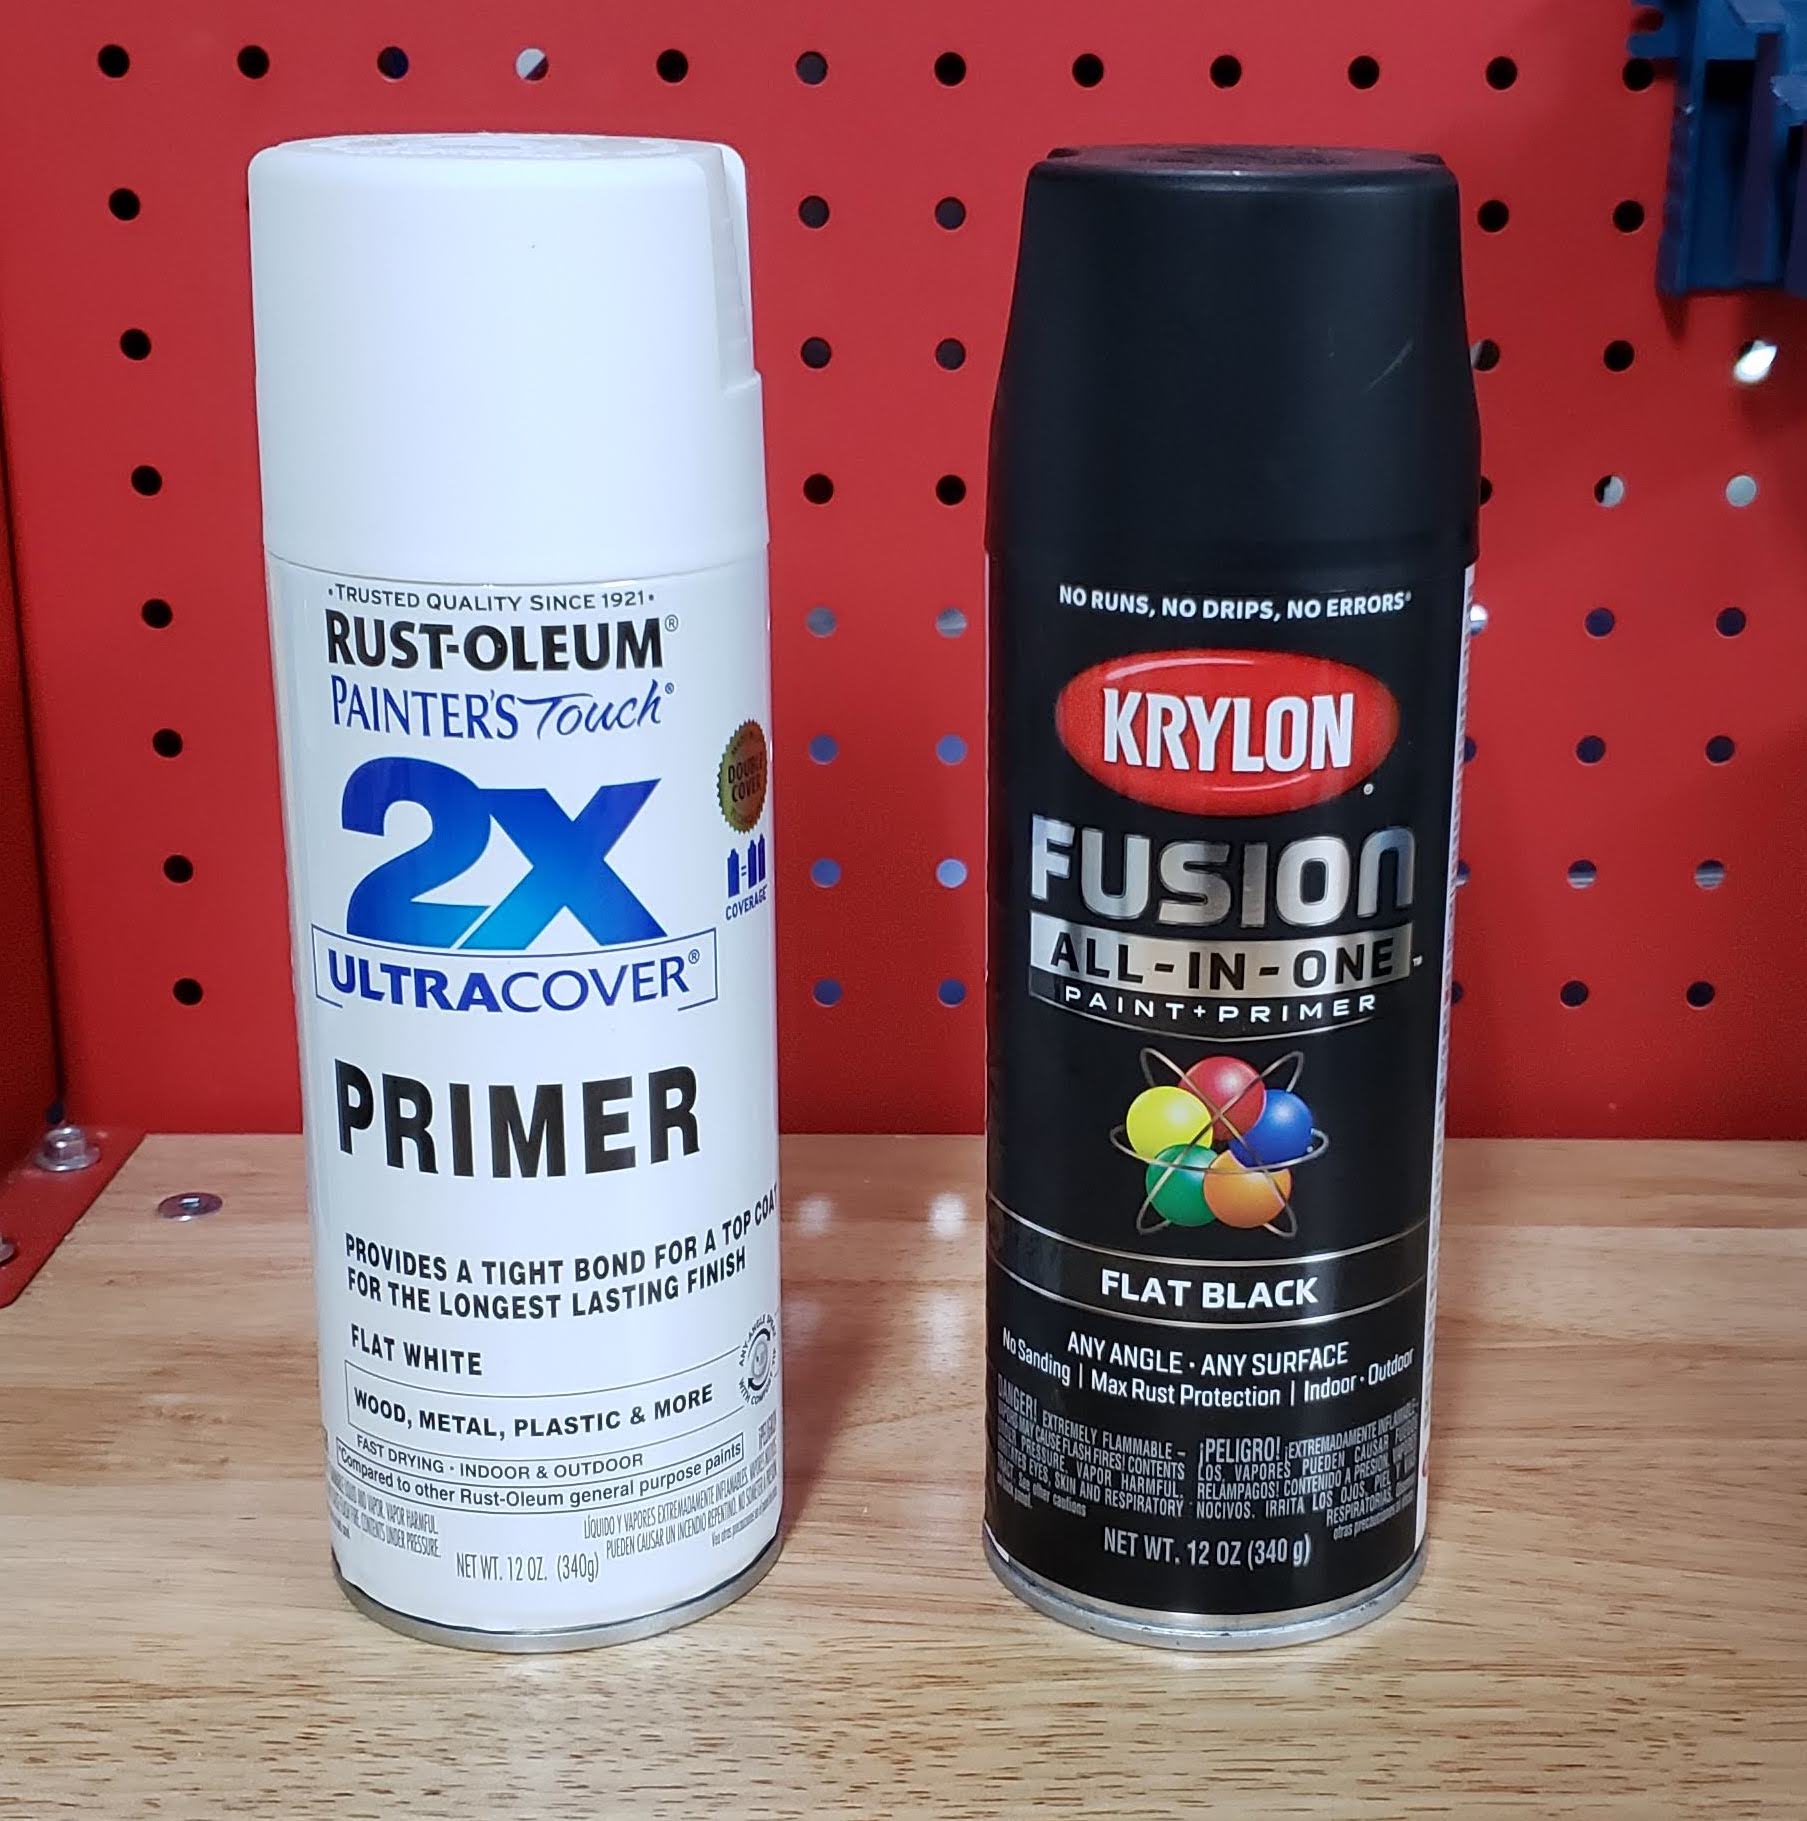
I carefully disassembled the case and removed the beige plastic piece. The entire beige part was a single piece (two if you count the hinged door) so I took the outer case and spray painted it with primer and later matte black spray paint. The result is pretty damn good, and now the unit looks perfect on my entertainment center. This was not as hard as I was expecting, it just took a lot of patience and a few coats of paint, I set up a little cardboard box to spray into and taped the pieces to paper cups so they could air dry without touching anything.
I did a truly insane amount of research into the best primer and spray paint to use for this job so let me save you some time: you can use pretty much any spray primer you want (but make sure you use something), but for the paint use Krylon’s Fusion All-In-One Paint+Primer (Flat Black). Yes, even though it includes Primer in the can, use a separate primer anyway. My hardware store didn’t carry this exact brand of paint, I had to go to a specialty paint store for it.
I configure my AVS system to automatically boot into the cartridge rather than the menu (I can access it if I need to with a controller hotkey), and I tweaked the video settings to my liking. I enable the extra sprites per scanline and I hide the left side of the screen which is where graphical glitches can often occur. And of course, I turn off interpolation.
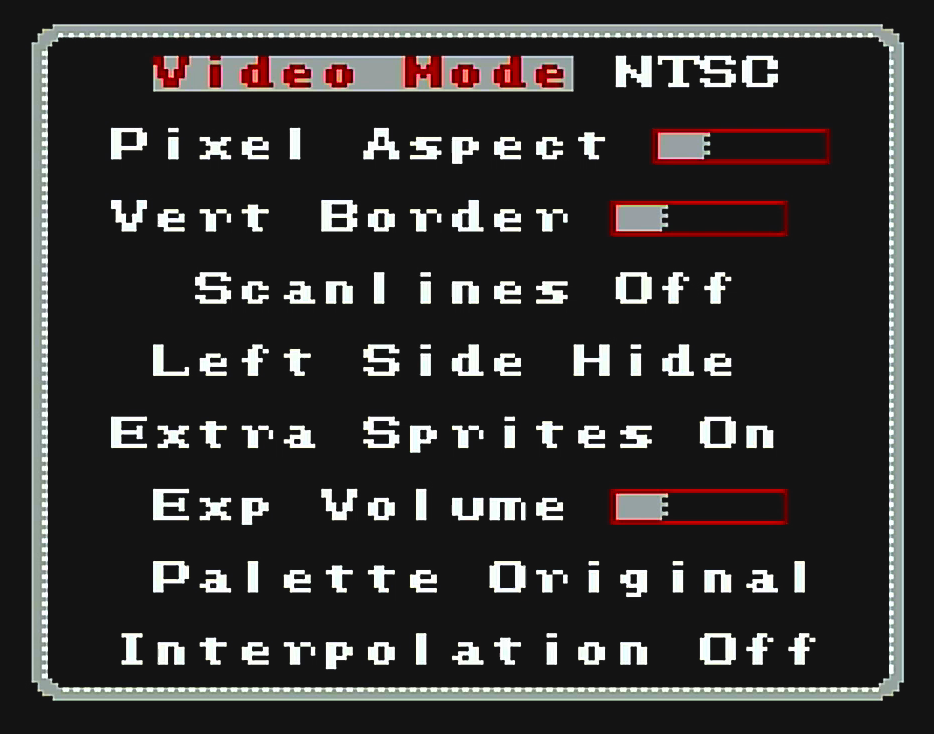
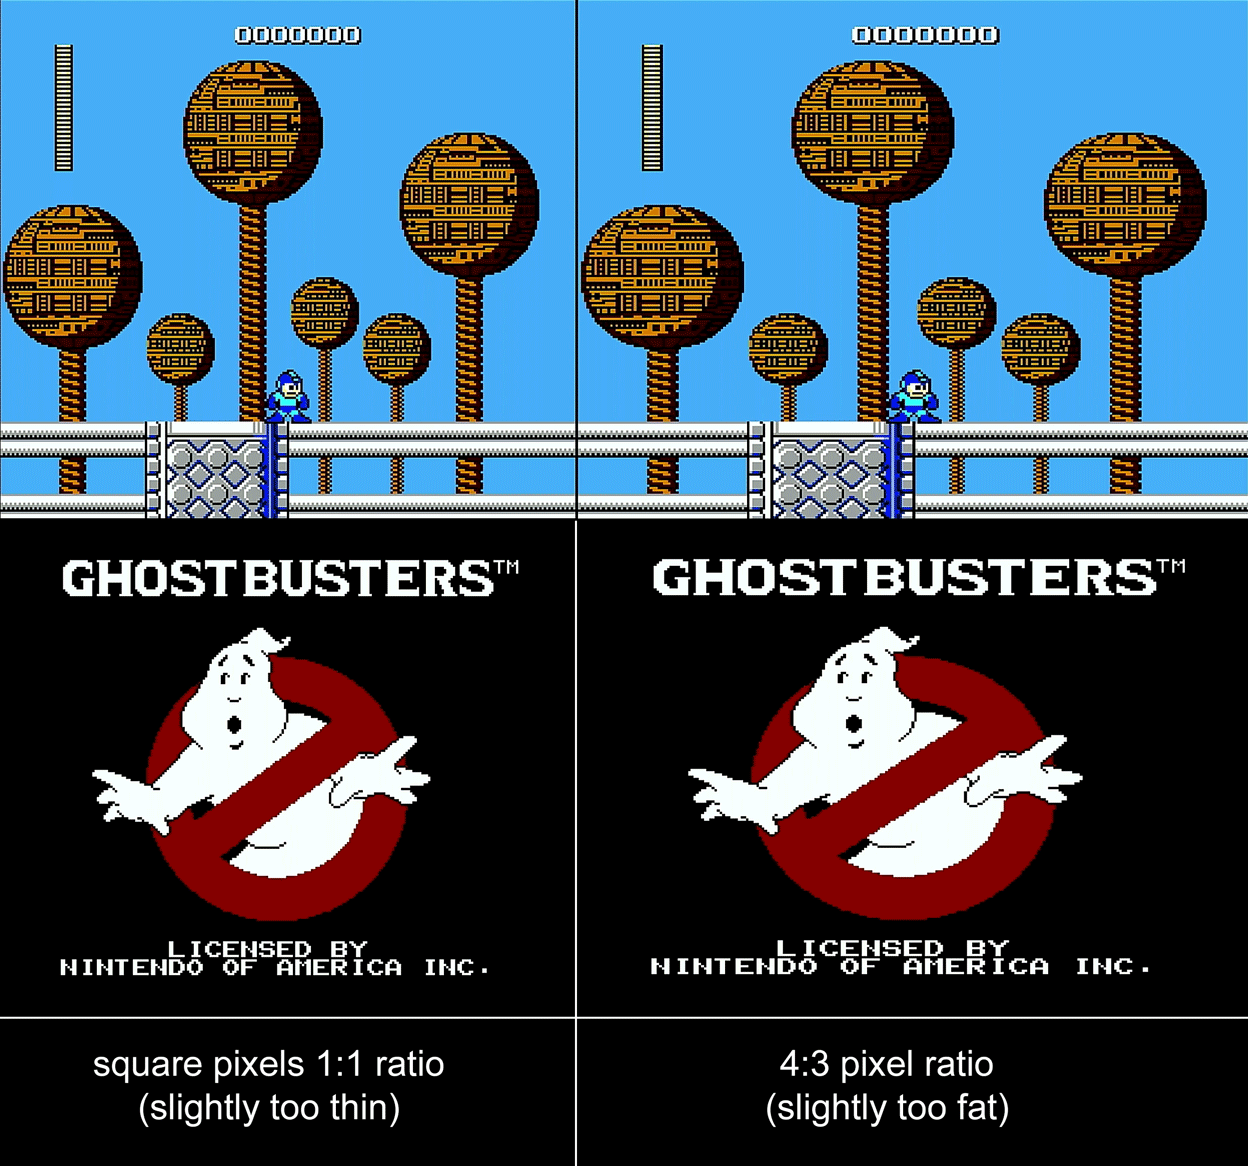
One of the weirder settings I enable is that I bump up the “Pixel Aspect” two notches. The reason for this is that, when game designers making NES games were designing graphics, they were designed for CRT televisions. CRT screens slightly stretched out the pixels so they were slightly wider than they were tall, meaning pixels weren’t rendered as perfect squares. As a result, whenever game programmers wanted to draw a “circle” they’d actually draw it as a slightly thinner oval, knowing the CRT screen would stretch the image out into a perfect circle.
Modern TVs won’t do that, and we’re scaling 240 lines for display at 720 resolution, so we basically have the option of scaling each pixel into a 3x3 grid of a 4x3 grid. The 3x3 grid is perfect square pixels, which means circles will be slightly thin. The 4x3 grid is fatter pixels, which gets circles a bit closer to how they rendered on CRT televisions. They wind up being just a little too fat, but actual perfection isn’t possible without interpolation so I chose the fatter circles. Yes, I checked, and the fatter circles are further from perfect circles than the thin circles are, but I still prefer their appearance.
Controllers
The NES 8BitDo controllers are terrible. The D-Pad regularly sends up and down commands when I’m pressing left or right, making most games impossible. And more importantly, it comes with 2 extra buttons that the original controller didn’t have, making it feel wrong in my hands.
The best option for an NES controller is the 8BitDo NES DIY Kit ($19.99). These kits come with a screwdriver to open an original NES Controller and it’s pretty easy to slip one of these kits into the shell to have a wireless controller.
You can go on eBay and buy some NES controllers but you’ll likely find that they’re in piss-poor condition, yellowed and covered in boogers or something - they’re gross. Luckily, however, the NES Classic Edition only came with a single controller but many two-player games. This means that there are tons of sold-separately NES Classic Controllers ($27.99) floating around that are the EXACT shape and size of the original NES controllers, and there’s an 8BitDo Mod Kit for those too, also $19.99. You’ll also have to get an 8BitDo Retro Receiver ($24.99) for the controller to connect to your AVS.
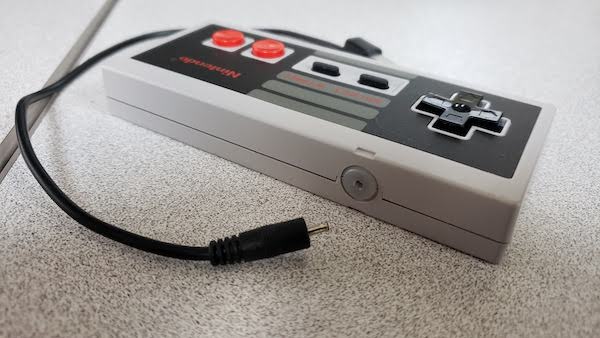
The controller problem is easily the biggest hassle (and cost) of getting a good NES system working but please do not buy the retroUSB NES controller, it is absolute dreck. It has the wrong shape, the buttons have an unnatural click, and the D-Pad is terrible, all for $65. I was grateful to have sold mine on eBay for $20 and I still feel kind of bad for the schmuck that bought it. The 8BitDo NES N30 wireless controller is marginally better, but the D-Pad is pretty terrible and it feels nothing like an original NES controller in your hand.
As painful as it is, an NES Classic Mini Controller, Mod Kit, and Retro Receiver are the way to go, even though it means each controller will cost, in total, $72.97. The other bummer is that the charge port for these controllers is a little custom circular port with a proprietary connector, so the magnetic charger cables won’t work with it.
Make sure that you update the firmware for BOTH your receiver and your mod kit. The mod kit’s firmware update port is only accessible when the controller shell is OFF, and unless both firmwares are updated to the latest version the NES Classic Kit won’t be able to communicate with an actual NES Reciever.
I only got 2 controllers for this despite the built-in 4-controller support in the AVS. There are only 24 NES games that support 4 players and these are easily the most expensive (and annoying) controllers to deal with. The best 4-player game for NES isn’t even an official NES game, it’s homebrew game Micro Mages.
Games
There’s only one candidate in town here, the EverDrive N8 ($127.99). On Stone Age Gamer you can get a black cartridge, though it doesn’t matter since it will always be hidden under the door of the AVS system.
The N8 takes a regular SD card and a 2GB card is enough for the entire NES library. SD Cards are a little harder to find in such small sizes than microSD cards, a 2GB add-on at Stone Age Gamer is only $8, you can also pick up a standard 4GB card for about $10.
The N8 supports save states and game genie codes if you’re into that sort of thing. The AVS also supports game genie codes, though I’ve never tried either and I think they both involve saving a bunch of special text files in various places to get them to work.
| | Component | Cost | |
|---|---|---|
| retroUSB AVS console | $185.00 | |
| NES Classic Controllers (x2) | $55.98 | |
| 8BitDo NES Mod Kit (x2) | $39.98 | |
| 8BitDo NES Receiver (x2) | $49.98 | |
| Everdrive N8 Flash cart | $127.99 | |
| 4GB SD Card | $10.00 | |
| Total w/ 2 controllers | $468.93 | |
| Total w/ 4 controllers | $614.87 |
Game Boy
My Game Boy Solution is actually to use my original Super Game Boy cartridge with an Everdrive GB ($138). I happened to already have a real Super Game Boy but they’re pretty easy to find on eBay for $20. You can even get one at GameStop for $12, though I’m sure that link will be broken by the time you read this and GameStop is out of business.
There’s also a Super Game Boy 2 that was only released in Japan and is rarer, but somewhat better as it plays the games at the correct speed (the original Super Game Boy plays games at a 2.4% faster clock speed than it technically should) as well as some extra borders you can draw around the game screen. Those sell on eBay for around $50-$100, but frankly, I don’t see much of the point.
Analogue has announced that in 2020 they’re releasing a product called the Pocket that will play Game Boy, Game Boy Color, Game Boy Advance, Lynx, Neo Geo Pocket Color, and Game Gear games. Supposedly this will also have a dock that lets it hook to a TV via HDMI and use a standard wireless 8BitDo controller. I’m very interested in all of this, but somewhat skeptical as well because Analogue kind of tends to announce adapters and accessories for their products that never get released (I’m still waiting for the Game Gear adapter for their Mega Sg).
In any case, the Game Boy problem (for non-color games) is solved for now, though I expect to fully replace this section of this post at some point when Analogue releases their Pocket with Dock, assuming it ever actually happens.
| | Component | Cost | |
|---|---|---|
| Super Game Boy | $20.00 | |
| Everdrive GB | $138.00 | |
| 4GB microSD Card | $5.00 | |
| Total | $163.00 |
Sega Genesis
I never had a Genesis growing up, but my best friend Ben did. I went over to Ben’s house all the time and played his very limited collection of games. The Sega Genesis always felt like the “cool” system - its mascot had attitude, its Mortal Kombat had blood. I played enough Genesis that I needed it to be represented in this project, even though I never owned one.
Console
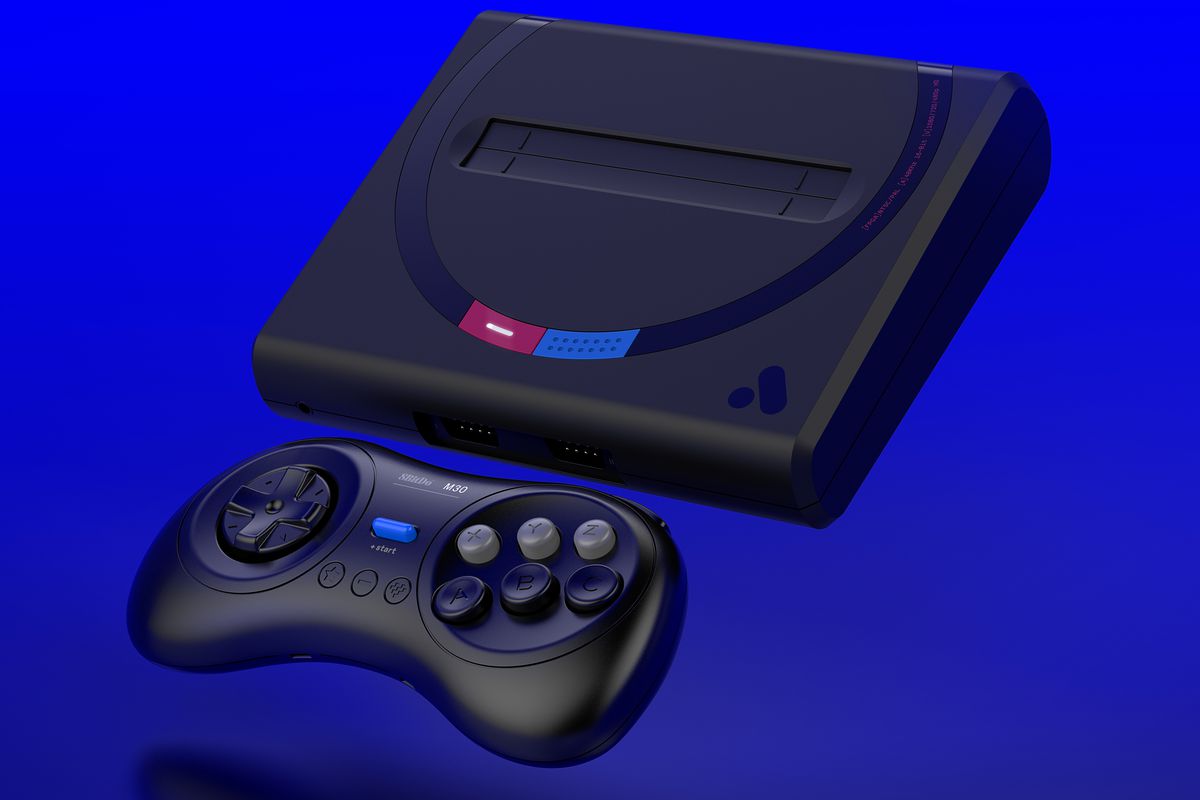
Once again, Analogue to the rescue with its Mega Sg ($189.99). And you better believe it comes in black - in fact, 3 different versions are all black.
The Mega Sg plays Sega Genesis, Sega Master System, and Sega Game Gear games without missing a beat. It comes with an adapter for Sega Master System games and promises one for Game Gear coming soon, and it’s even compatible with the Sega CD add-on, though we’ll see in a moment why none of that actually matters.
Genesis and Sega Master System games output at a variety of different resolutions, but the Mega Sg will handle most of this weirdness for you and send a clean 720 signal out over HDMI. Personally, I’ve noticed that the sound chip in the Mega Sg isn’t quite right, but I’ve always thought the Genesis had terrible sound so this doesn’t bother me too much.
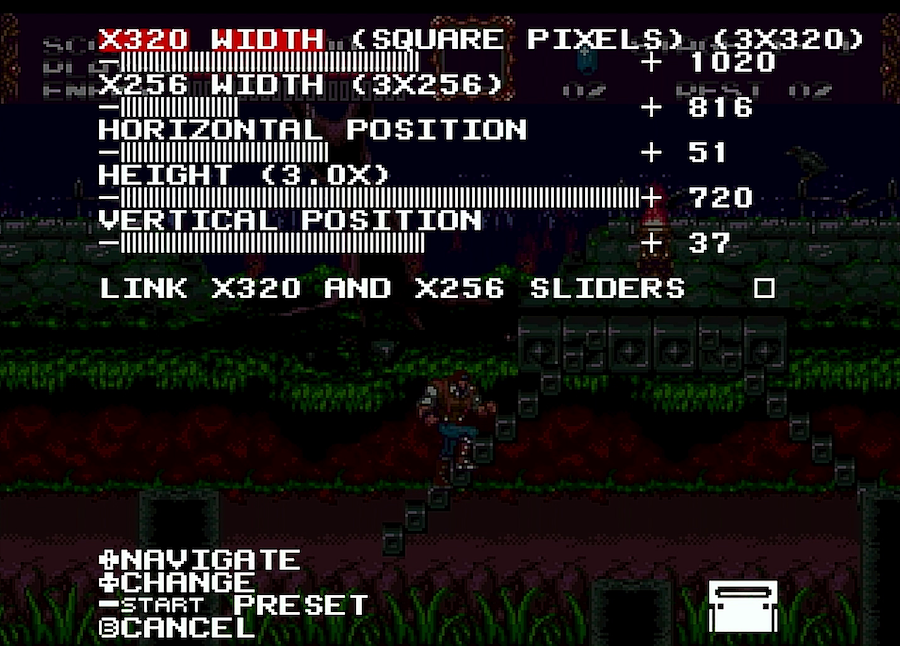
I set the Mega Sg to output at 720p60, and use 3x integer scaling for games running in x320 resolution and x256 resolution (some games use different resolutions, the Genesis was a real duct-tape-and-baling-wire kind of a system). I also, of course, turn off all horizontal and vertical interpolation.
I have toyed around with another setting, which is outputting at 1080p60 resolution and setting the integer scaling to 5x in all dimensions. The net effect of this is that the top and bottom of the game are just very slightly cut off, but the screen is filled, just like with the Super Nt. Since CRTs often cut off about the same amount of space, games rarely put anything useful in this zone, and it looks quite nice. I go back and forth on these settings, I haven’t picked my preference yet but My Life In Gaming has a great video going over all the Mega Sg settings that can help you decide, though I obviously disagree with their suggestion you leave the default 4.5x scaling setting enabled.
Controllers
There are no 8BitDo mod kits for the original 3-button Sega Genesis controller that I most strongly associate with playing Genesis games. However, I actually always hated the feel of the Genesis controller so I’m making a slight exception to my rules for this one.
Here I just recommend the 8BitDo M30 Gamepad for Sega Genesis ($24.99) which comes with the Genesis receiver. There is a mod kit for a 6-button Megadrive controller but it just seems like too much work for a controller I never liked - and the nice thing is that the 8BitDo controller comes with an extra button in the middle that you can map to pulling up the Mega Sg menu system.
I prefer the D-Pad of the 8BitDo controller much more over any official Sega controller, which I’m sure is no good for Sega purists but since I never actually owned this system, I’m not as attached to the feeling of the controller as I am for other systems.
Games
There is indeed a Mega Everdrive ($165.99) that will play Genesis, Master System, and Game Gear ROMs on the Mega Sg (so you don’t need to use the Sega Master System adapter or buy a Master Everdrive for those). And yes, it comes in black.
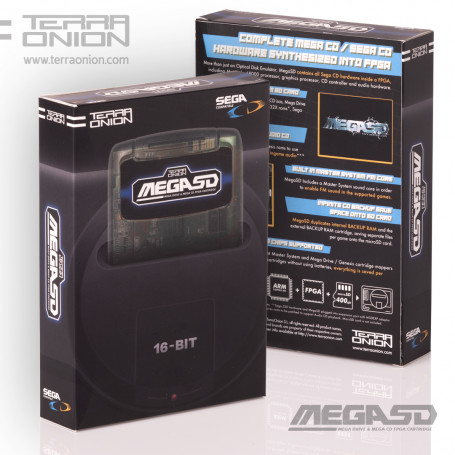
However, there’s also something pretty new in this space called the Mega SD from Terraonion (€232.00, about $260). This sucker comes with an FPGA chip that implements, somehow, the entire Sega CD processor. This means that even without the Sega CD attachment, you can play Sega CD images off the cartridge directly in the Mega Sg. Just like the Mega Everdrive, it will load standard Genesis, Master System, and Game Gear games, but the ability to play Sega CD games is just way too cool to pass up - that was a system Ben didn’t even have!
Springing for this option adds an extra $100 to the cost of the endeavor, not to mention that you’ll need a monster 128GB microSD card ($19) to store the entire Sega CD library in addition to Genesis, Master System, and Game Gear ROMs. Be very careful formatting this cart and follow the instructions with your Mega SD, improperly formatting the card will cause confusing and frustrating issues. The manual also gives specific instructions on some settings you need to change for the Mega Sg in particular, follow those or you won’t have sound.
Stone Age Gamer lists their variant of the Mega SD coming soon, but I imagine they’ll offer different shell colors and whatnot when it’s available. Brutal honesty, the menu system and presentation alone make the Mega SD worth it over the Mega Everdrive.
| | Component | Cost | |
|---|---|---|
| Mega Sg FPGA Console | $189.99 | |
| 8Bitdo Genesis Controllers (x2) | $49.98 | |
| Mega SD Flash Cart | $260.00 | |
| 128GB microSD card | $19.00 | |
| Total | $518.97 | |
| Total w/ Everdrive instead of Mega SD | $415.96 |
Nintendo 64
The Nintendo 64 has my wife’s two favorite video games: The New Tetris and Dr. Mario 64. As such, it’s a system where it was most essential that it be easy to work with and that it supported all 4 players without a problem.
Console
There is no FPGA-powered Nintendo 64 clone unit, at least not right now. So the only game in town is an actual original Nintendo 64. I had one of these already, but I wanted an original Gray one because that was as close as I could get to black, and I was able to snag one on eBay with 4 working controllers for about $130.
The N64 outputs composite only and looks pretty crappy. The main issue with this is that if you hook it up to a modern television, the TV will not see the 240p signal as 240p, but instead will see it as 480i, which will make it do all sorts of terrible things to the image.
One solution is to first run it through a simple scaling unit, the RetroTINK 2x ($100) does a great job. It basically takes the incoming 240p signal and just doubles each line (hence the 2x), doing a 2x integer scale with zero lag, and outputs a 480p signal that a modern TV can accept. The RetroTINK will actually do with this with any other retro consoles like if you’re messing around with a Neo Geo or a Turbo Grafx 16 or something. It’s a nice handy little piece of equipment, but it does suffer one fatal flaw.
The RetroTINK requires its own separate power source, which means it’s always on. When it’s not receiving a signal to convert, it outputs a color test pattern. This is likely fine for most people, but as we’ll see in a later section of this writeup I’m hooking all of these units to an active HDMI switcher that switches input based on what it detects as sending a signal. Since the RetroTINK always outputs the rainbow test pattern, the switcher sees it as always on, which means my wife has an extra button to press to use the system and has to mess with inputs. This violates my “wife-friendly” rule, and in particular it does so on the very system she is most likely to use, which is no good.
There’s something new called the RAD2x (£47.99, about $63) that is, as of this writing, available only for pre-order. This is essentially a cable with a tiny RetroTINK 2x inside of it, which hooks directly to the N64 and sucks just enough amperage off the wires to power the embedded RetroTINK. The result should theoretically be something that doesn’t send any signal until the unit is turned on, allowed it to play well with active HDMI switchers like mine.
Whatever you do, don’t go for the EON Super 64 ($150). It’s nearly double the price of the RetroTINK and triple the price of the RAD2x, and it does the exact same thing. It was a little tempting for me (in fact, I did buy one) because it played better with the active HDMI switcher than the standard RetroTINK did, but with the RAD2x it simply serves no purpose, and there are reports of it shorting out N64s and causing damage to them.
Of course, none of these are what I did. The best-looking solution to the N64 problem is the UltraHDMI which is a kit and process for physically modding your N64 to give it an actual HDMI port. The UltraHDMI Kits ($165) are currently sold out, but I was able to find some folks in a small community about Nintendo 64 where people had some and were willing to install the mod for a small fee ($100). I sent the N64 and a super cool dude modded it for me, sending back a perfect UltraHDMI-modded N64.
To be honest, the graphical difference between the UltraHDMI output and the scaled-up composite image through the RetroTINK is virtually nonexistent. Nintendo 64 games don’t look great anyway, and because of the 3D nature of the games, the crispness of the pixels isn’t as important as it is for something like a Super Nintendo. The only reason this mattered to me was that the game we play most often on Nintendo 64, Dr. Mario 64, uses 2D sprites and thus is one of the very few games where the graphical difference is somewhat noticeable. I’m very happy with my UltraHDMI-modded N64 but frankly, I don’t think it’s worth the trouble over the RetroTINK 2x, especially the RAD2x variant that’s less than $70 and works with an active switcher just as well as mine.
So while I completed this project relying on an UltraHDMI mod as well as the kindness of strangers, I don’t recommend that route. And though I do not myself own an RAD2x, I do have a RetroTINK and if the RAD2x does what the RetroTINK does (but preserves an active signal for switching) then that’s what I recommend going with for an N64. The great part of this solution is that it can work with your existing N64 with no changes, so if that’s all you’re looking to hook up it’s a super cheap solution.
All of that being said, I would be remiss if I didn’t point out that the RAD2x performs a 2x integer scale on the 240p N64 image, but the resulting 480p signal does NOT integer-scale to a modern television. 2160 is not evenly divisible by 480, your TV is going to have to do some interpolation to scale the 480p signal. Again for the N64 which doesn’t use pixel sprites in many games, this is unlikely to matter and I still recommend the RAD2x as the solution. But if you’re like me and really tweak out about this integer scaling thing, you’ll need an UltraHDMI which can 3x scale the 240p resolution to 720p, which can then be integer-scaled by your television 3x to get a 2160p signal.
Controllers
You ever go to a friend’s house to play some Nintendo 64 and he gives you the MadCatz controller? Feels bad, right? It’s not fair he gets the good Nintendo controller and you have this dumb transparent piece of shit. That’s because the only good controllers for Nintendo 64 are official controllers, so just get those.
There are no decent wireless options, Hyperkin keeps teasing a wireless controller but even if that’s ever released, it probably won’t be as good as the original controller. There are replacement parts for the joysticks and even joysticks that will make them feel like Gamecube sticks.
My suggestion is to just get controllers on eBay, there’s an absolute ton of them and they generally won’t run more than $25 apiece. You can pick up an N64 Controller Extension Cable ($9.99) to get it to your couch just like I wanted to, I bought a cheap pack of 4 for $11.59.
Games
The Everdrive 64 will run you $179.99 and play every single Nintendo 64 game ever made. It’s got Gameshark code support as well. The biggest headache you’ll encounter is getting your save games off your original Nintendo 64 cartridges and onto the SD card - a process I never got working even after buying lots of weird accessories to do this, I wound up just losing our progress in The New Tetris (we had unlocked all of the Wonders, which takes absolutely forever) and starting over which was a bummer.
A 16GB Card will store the entire N64 library, should run you about $15.
| | Component | Cost | |
|---|---|---|
| Nintendo 64 + 4 Controllers | $130.00 | |
| RAD2x N64 to HDMI Cable | $63.00 | |
| Controller Extension Cables | $11.59 | |
| Everdrive 64 | $179.99 | |
| 16GB SD card | $15.00 | |
| Total | $399.58 | |
| Total w/ UltraHDMI instead of RAD2x | $601.58 |
Atari 2600
The Atari 2600 was the first video game system I ever played. The first time I played Pac-Man wasn’t in an arcade, it was on the Atari 2600. I owned E.T. the original cartridge. Some of my fondest memories are the Atari 2600, so it was critical that I have one working for this project. This also turned out to be the last system I was happy with, and it was easily the most difficult part of the project.
Console
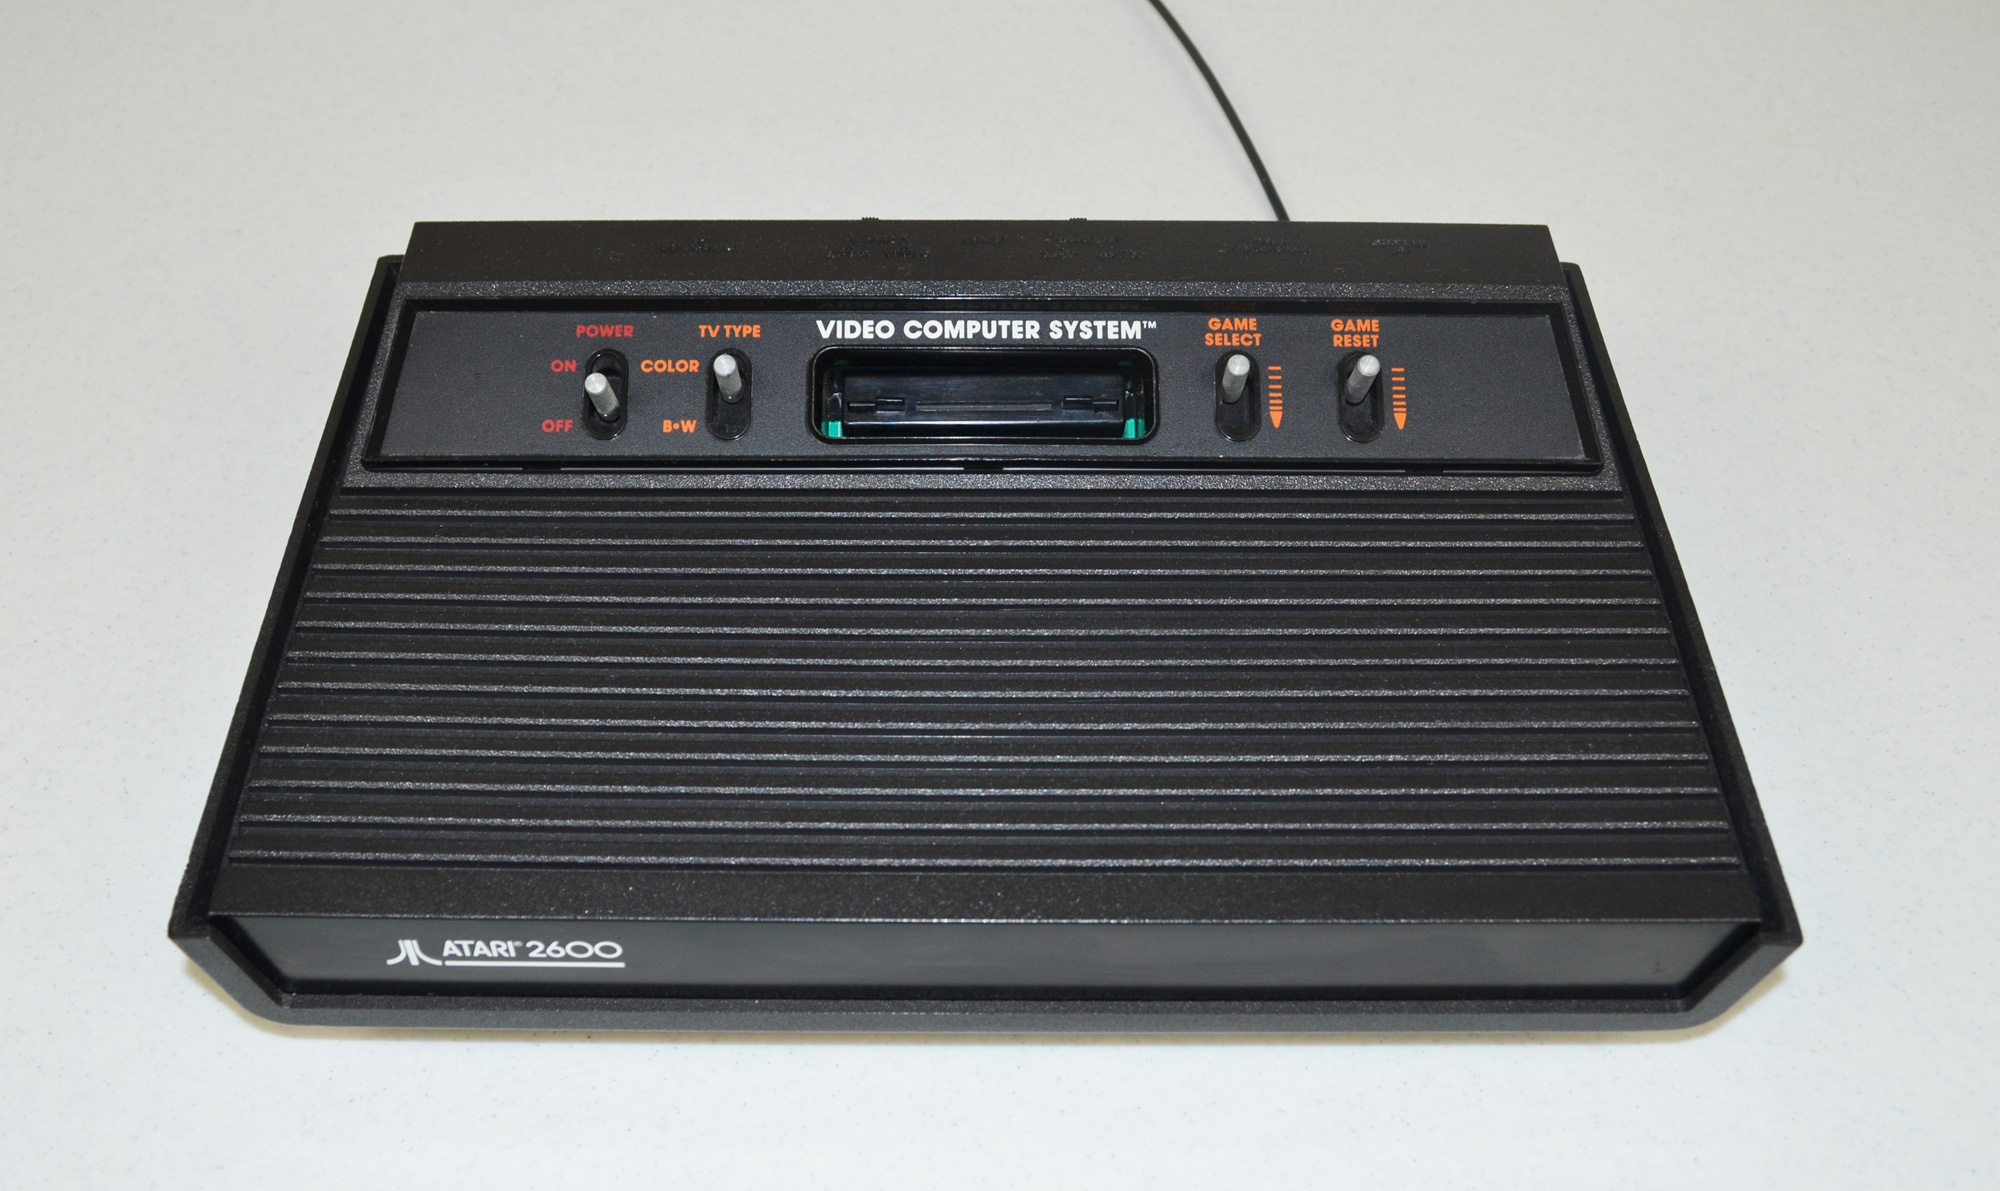
Atari 2600, 'Vader' 4-switch variant
Once again, there are no FPGA Ataris out in the world, and all of the variants of ‘Atari flashback’ systems are indeed emulators. Further, most Atari 2600 units used RF output to hook directly to old television sets, they didn’t even support basic Yellow/Red/White RCA outputs. This means there’s basically no way around modding an Atari 2600 console if you want to play it on a modern television. Because Ataris are so old and cheaply made, they often have busted capacitors or leaks that create additional problems. You can pick one up on eBay for $40.
There are tons of variants of the Atari 2600 with stupid confusing nicknames like “Heavy Sixer” and “Vader”. My first attempt to solve this was just buying a pre-modded Atari 2600 Jr (it’s small and black) that’s been modded with composite out. Unfortunately, this unit resulted in really bad Jailbars. I talked to the seller but he himself was simply reselling a unit that he’d bought modded, he didn’t do the mod himself and had no idea why I was seeing the jailbars - he was hooking his unit to a CRT display rather than an modern TV like me.
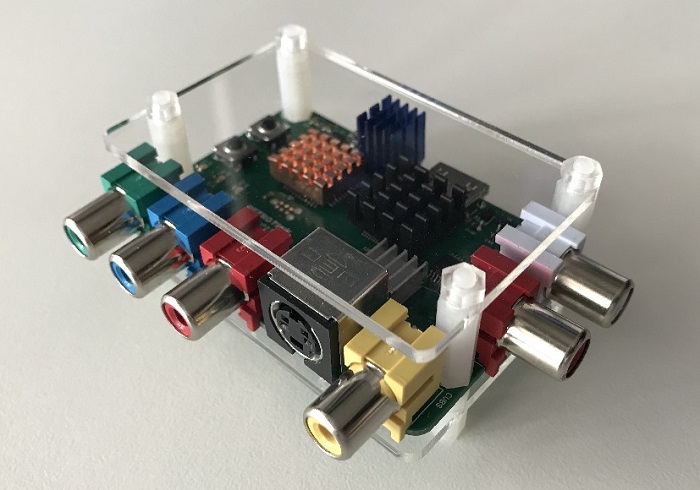
I actually bought a different pre-modded unit on eBay after this, a 4-switch Vader unit modded with S-Video output. The jailbars were gone, but the colors were terrible and the refresh rate was garbage. I was close to giving up when I discovered Tim Worthington’s Atari2600 RGB Mod. This was a mod that allowed an atari to output a signal called RGB, which was much much higher quality than Composite or S-Video. Of course, I lacked the technical soldering skills to pull off this mod without risking the Atari, but I found that iFixRetro would do it for $100. I just needed to order and send the appropriate 2600RGB mod kit (AU$77.00, about $55) and my Atari. Ben (different Ben, not the one I knew as a kid who owned a Genesis) did an amazing job and promptly sent back my modded Atari with an RGB out port and it worked great.
Etim’s 2600RGB board installed on an Atari 2600 Junior console! Play your games in pixel perfect display with the ability to swap color palettes with a push of a button! pic.twitter.com/gQ5SjCBWjX
— iFixRetro (@iFixRetro) October 11, 2019
Unfortunately that’s not the end of the story. I still had to hook the unit to a TV. For this, I went a bit overkill and used a Micomsoft Framemeister xRGB Mini ($410), an upscaler unit that many retro game aficionados swear by. I actually bought this unit when I first started this whole project because I was using it to try and upscale various other signals like the N64, but in the end the only thing I needed it for was the Atari, since the mod outputted an 8-pin Mini-DIN xRGB port which was exactly what the Framemeister takes as RGB input. With a straight-through Mini-DIN 8pin cable ($16) I could get the signal from the Atari to the TV.
The Framemeister always outputs a blue screen signal, which doesn’t play well with the active HDMI switcher, but that’s alright in this one case - I’ll explain why in a later section. It’s also worth mentioning that the Framemeister is a Japanese product and both the remote and the on-screen menu system are in Japanese. With a firmware update, you can get the Framemeister menus to be in English, and there’s an English remote overlay (£4.99, about $6.50) if you want to get fancy.
I’m not going to detail my Framemeister settings here because the upscaler unit simply has tons and tons and tons of settings, it really is the end-all-be-all of retro gaming upscaler units which is why geeks like it so much. Basically, I just messed with settings until it looked nice - I’m using it for an Atari 2600 so it’s not going to come out looking like the Mona Lisa no matter what I do.
Controllers
You can get Atari 2600 controllers on eBay for about $10 each, good condition paddle controllers are a bit harder to find but run for around $20. Retrobit makes replacement controllers ($16.99) but please avoid them, they are absolute garbage that will literally snap apart in your hand and make an annoying clicking noise that the original controller never had. Plus the button is the wrong color and feels wrong to press. Extension cables run about $10 each. I think eBay is the best bet, but I will admit that about 50% of the controllers I get are crap, so you have to buy lots before you get enough decent ones - this is even more true of the paddle controllers.
Some old wireless Atari 2600 controllers are floating around out there but they are best avoided. You used to be able to use a Genesis controller with an original Atari, but sadly the 8BitDo wireless controllers do not seem to work with an original Atari, I think it might be a power issue.
Games
The Atari 2600 flash cartridge is called the Harmony. The latest version is called the Harmony Encore ($69.00) which is exactly like the original Harmony but can play homebrew games larger than 512K and it’s only $20 extra. What’s $20 when you bought a $400 Framemeister to play Frogger?
You’ll need an SD card but the entire Atari library will fit on a small piece of paper so the smallest SD card you can find will do.
| | Component | Cost | |
|---|---|---|
| Atari Console | $40.00 | |
| 2600RGB Mod | $55.00 | |
| iFixRetro Modding Service + shipping | $130.00 | |
| Framemeister Upscaler unit | $410.00 | |
| 8-Pin Mini-DIN cable | $16.00 | |
| Various Controllers | $60.00 | |
| Controller Extension Cables (x2) | $20.00 | |
| Harmony Encore Flash Cart | $60.00 | |
| 2GB SD Card | $10.00 | |
| Total | $801.00 |
That’s right, the ugliest and oldest system in this entire project was the most expensive, nearly double the next most expensive system. I hope my wife never sees this post.
I keep pestering the guys who made the RAD2x cables to make one that takes 8-Pin xRGB Mini-DIN, which would remove the dependency on the Framemeister and reduce this cost by about $350. Unfortunately, there is no way around the modding of the Atari that I am aware of, and in between having my mod done and writing this blog post, the 2600RGB Mod Kit has completely sold out and I’m not aware of any useful alternative.
Putting it All Together
Okay, so how do I connect all of this antiquated junk together? I have a standard receiver but it only accepts 10 HDMI inputs. After taking out the Playstation 4, Switch, 4k Blu-Ray player, Shield TV, Computer, and VCR (yes, really), I’m left with 4 slots available and 5 systems to connect.
Furthermore, I don’t actually want these units going through the receiver. The receiver connects to HDMI 2 on my television set, and I don’t set HDMI 2 to be in “Game Mode” because I enable some processing to make movies look better, and that’s what I do with the TV most of the time.
What I needed was some kind of HDMI switch unit that would introduce no lag and let me connect to HDMI 3 on the TV, then set my receiver to use the TV’s audio out to play sound through my speakers. I can set HDMI 3 on the TV to always be in Game mode with no processing, nearly eliminating lag. I can also set HDMI 3 to not use “Deep Color” (HDR) which plays weird with the Framemeister.
The switch unit I went with is the IOGEAR 8-Port HDMI Switch ($153). This switch is an “Active Switcher” which means that if it’s sitting on Input 3 for example, and all of a sudden Input 4 becomes active because the console attached to that input is turned on, it will automatically switch to Input 4. This is perfect because it means that, once everything is “on” merely pressing the physical Power button on one of these consoles will automatically switch to it, satisfying the wife-friendliness parameters of the project.
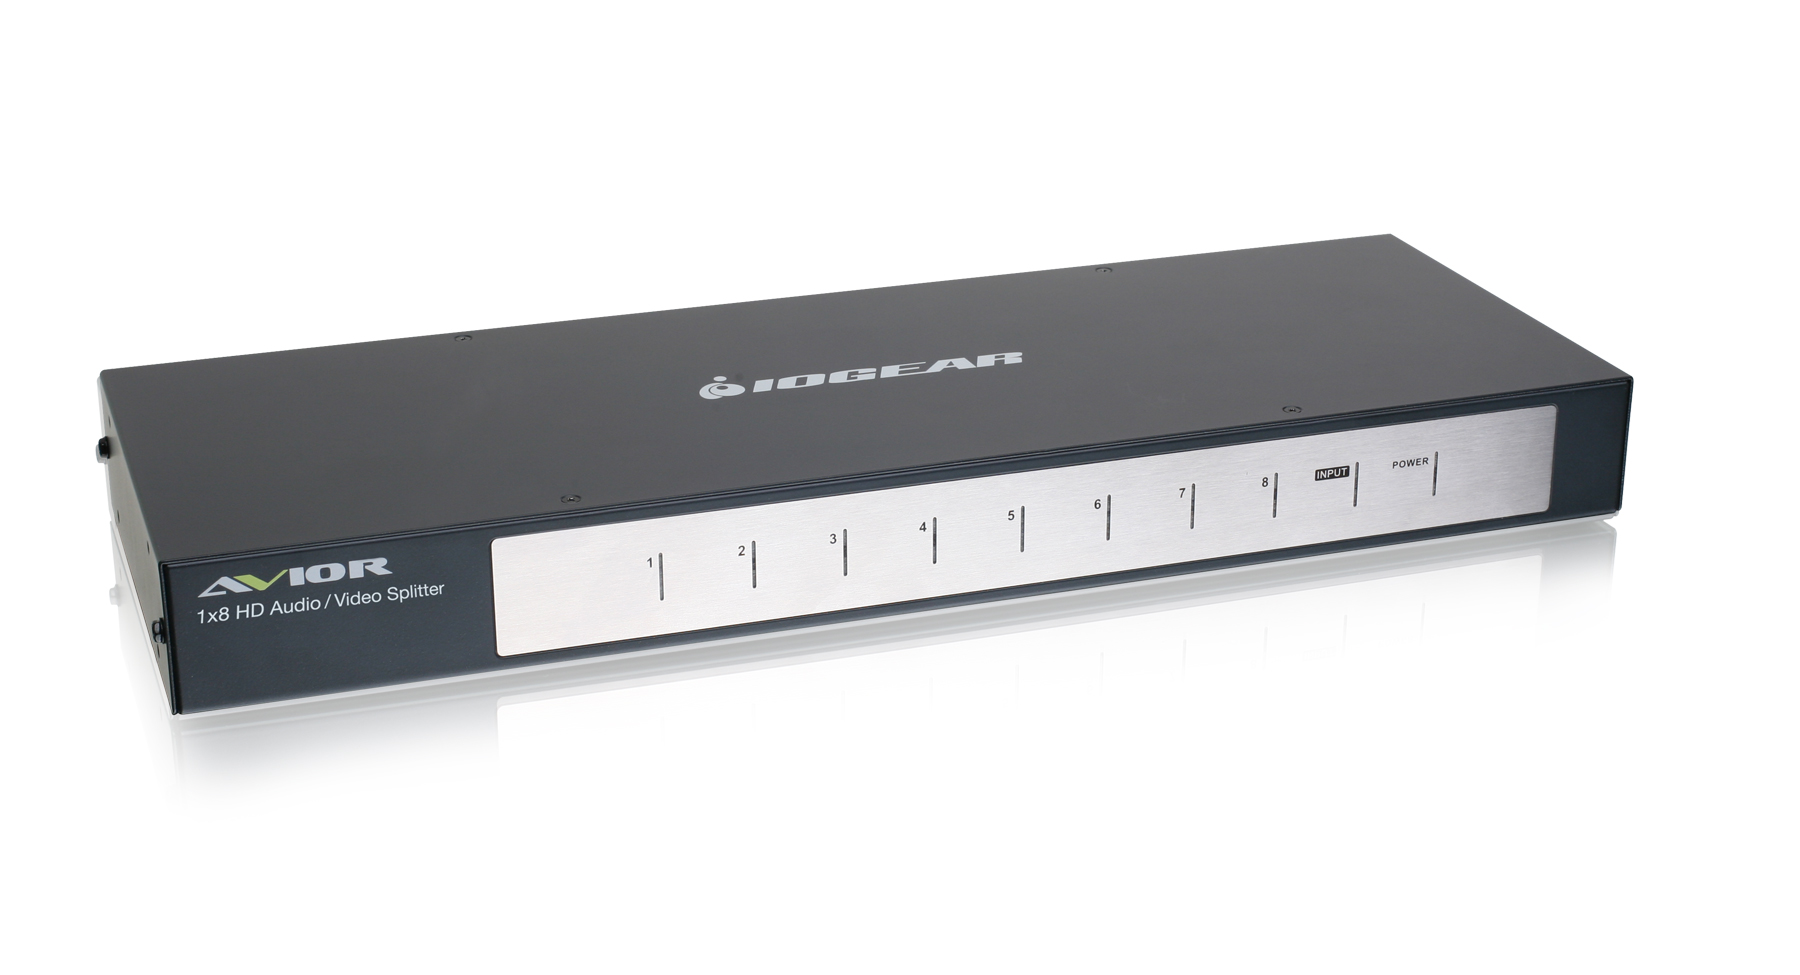
It also is one of the very few HDMI switches I found which supports more than 4 ports (I need 5, plus I’ll need a 6th when the Pocket comes out). This switch also comes with a remote control that allows me to set an input. The reason this is useful is that it allows me to program a single ‘Play Retro Game’ activity on my Logitech Harmony universal remote control that turns on the TV, tunes it to HDMI 3, sets the receiver to TV Audio, turns on the IOGear switch, and sets the IOGear to Input 8. Input 8 is what I have the Atari’s Framemeister hooked to, so when the whole system comes up there’s a friendly blue screen indicating everything is online.
At that point, no matter what game system you turn on physically to play, the correct thing will happen. If you turn on the Atari, it’s already on Input 8 so it just works. If you turn on anything else, because they aren’t sending HDMI signals until they are on the act of powering on the system will cause the switcher to change inputs to what you’re playing.
The other nice bonus of this approach is that my TV has a weird habit of switching back to HDMI 2 if it doesn’t detect a signal on HDMI 3. If you’re not quick enough turning on an actual console, the universal remote and actual TV can get out of sync, but the Framemeister broadcasting a blue screen signal on Input 8 ensures this doesn’t happen.
The final component is a strange one: it’s an HDMI splitter ($18.50) which simply takes a single HDMI input and splits it to two HDMI outputs. You are almost certain not to need this, but I wound up needing it.
HDMI is a fairly tricky interface, one major component of it is a handshaking process that is used to ensure only certain kinds of media are sent to certain kinds of devices, a process referred to as HDCP for High-bandwidth Digital Content Protection. The issue is that some of these devices are outputting HDMI from little custom circuit boards and other hacker-y type tools, and I often encountered problems where my LG OLED C8 4K Television would fail to properly handshake with a device and it would just display ‘Invalid Format’ on the screen. I searched all over the web and found almost nothing useful about my TV would say this - the error message almost implies it’s like a resolution issue or something.
I finally determined after much troubleshooting that the LG TV is not properly negotiating the HDCP signal with a console - a problem found most frequently with my UltraHDMI board (it did this with two different boards). My solution was simply to find a low latency device that could connect directly to the TV and negotiate an HDMI handshake with it and keep its connection active while different systems were powered on and off downstream. The HDMI splitter does exactly this (plus, gives me a way to capture my gaming sessions to a laptop if I were so inclined which I am not). This splitter completely removed the Invalid Format error permanently by sitting between my HDMI Switcher and the TV.
If you don’t go with the UltraHDMI for an N64, or you don’t have my specific television, you’re unlikely to need this splitter at all, but I’m mentioning here because I certainly did.
Most of the newer consoles from Analogue came with their own HDMI cables but I sprung for some Ultra Slim HDMI cables ($5) for everything to ensure they were all black and thin enough to not be obtrusive, which was useful given how many extra cables were going all over the place to put this project together. I needed 5 for all 5 consoles, 1 from the switch to the splitter, and one from the splitter to the TV.
| | Component | Cost | |
|---|---|---|
| IOGear 8-Port HDMI Switch | $153.00 | |
| HDMI Splitter | $18.50 | |
| Ultra Slim HDMI Cables (x7) | $35.00 | |
| Total | $206.50 |
Grand Total
Alright, so how much did I spend on all this dumb crap?
| | System | Cost | |
|---|---|---|
| Super NES | $479.96 | |
| NES | $468.93 | |
| Game Boy | $163.00 | |
| Sega Genesis | $518.97 | |
| Nintendo 64 | $601.58 | |
| Atari 2600 | $801.00 | |
| Connectivity | $206.50 | |
| Total | $3,239.94 |
Yikes, kind of wish I didn’t do all that math just now. I’m not including the price of the TV itself because I would have gotten that anyway, and also it would be depressing.
All this being said, I think the Atari 2600 was way too much because of the Framemeister, and it’s very possible there’s a cheaper alternative. I think an OSCC Scan Converter ($179.99) and Mini-DIN to SCART cable ($25) would have worked just as well and shaved about $200 off the overall price tag - I largely went with the Framemeister becuase I already had it from when I first started this entire project. And again, the UltraHDMI in the N64 was massive overkill, a RAD2x adapter could easily shave off another $200.
Overall, someone could accomplish exactly what I did with this project by learning from my mistakes and spending under $3,000.
Closing Remarks & Remaining Work
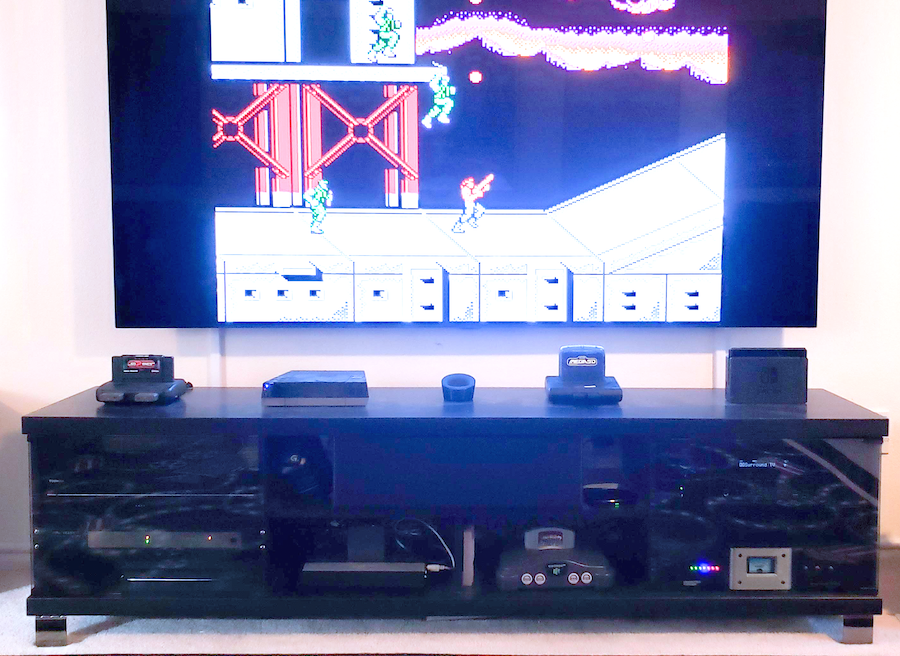
The whole shebang
I still don’t love my Atari setup, the Framemeister feels clunky and I secretly wish I could get the Atari to play nicer with the active switcher and only send a signal when it’s turned on. And like I mentioned earlier, I’ll be jumping at the chance to replace my Super Game Boy with a more permanent portable solution that can add Game Boy Color and Game Boy Advance games to my roster.
I’d definitely love to see a decent wireless N64 controller, and I’d be happy to replace my extremely expensive NES wireless controllers with something that feels like a real NES controller but uses a standard USB port to charge instead of the weird custom thing the mod kit uses.
I also don’t have a way to play old Intellivision games. I actually did have access to an Intellivision when I was a kid, but I really have no idea how something like that could even work with my hatred for physical cartridges since each game came with a controller overlay that was basically essential for playing.
The Mega Sg does not currently support 32X games due to how the Sega 32X add-on was implemented, but I’d love to add that capability to this entire setup should some kind of adapter or add-on ever get released that does not rely on emulation.
These are all minor tweaks and improvements though, I largely consider this entire effort “done” and I’m not seeking to sink any more money into it right now. I can go downstairs and pick up and play any old game from any old system I remember as a child, and I really love it. I learned a lot through this whole process (but not too much) and it was a blast walking down memory lane as I got everything working.
Further Resources
I found a lot of web sites and YouTube channels super helpful getting up to speed on all this stuff, you might find them useful as well.
Shopping:
Information:
- RetroRGB
- My Life in Gaming
- Game Sack
- The 8-Bit Guy
- Rerez
- Classic Gaming Quarterly
- Retro Game Mechanics Explained
Feel free to add your own suggestions, highlight ways of doing this same stuff better/cheaper, or ask questions in the comment section below but do not ask where to get ROMs or BIOS images. You’re flat-out on your own for that stuff, I’m deleting every comment asking for such things.
Game on!